• Website Plugin / Stats Tool
Shopify Instructions

Step 1

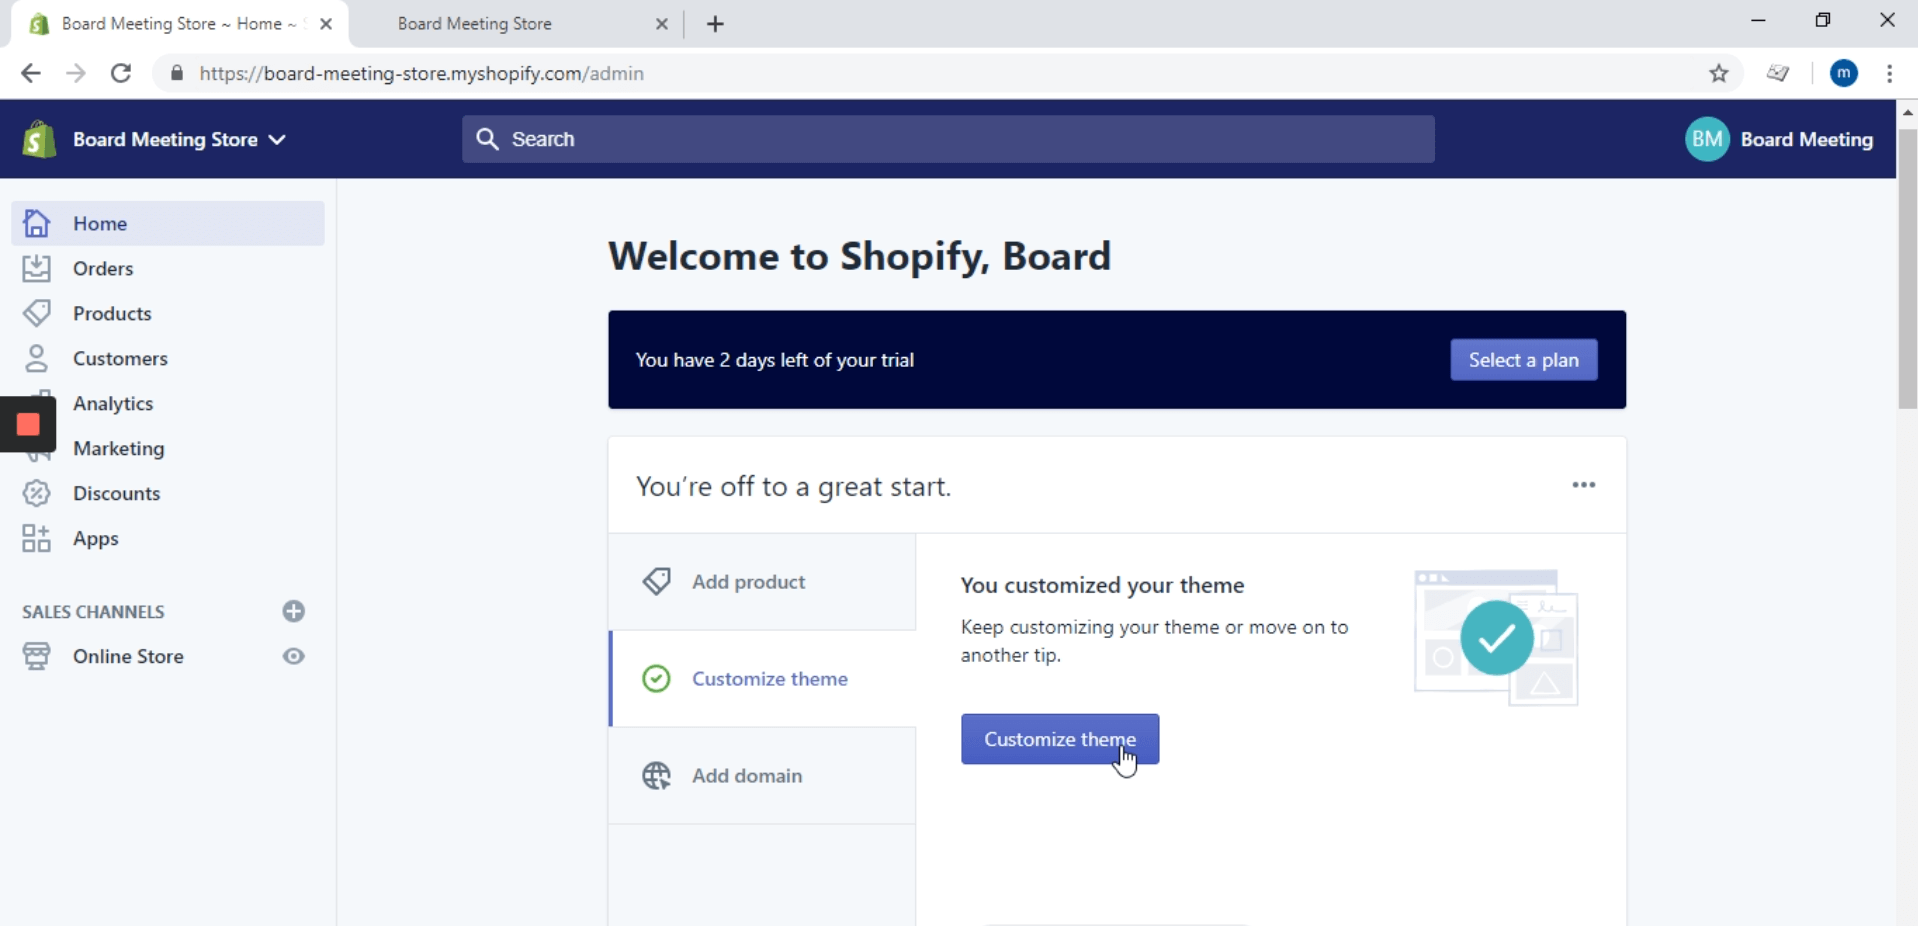
Go to your Shopify admin site.

server

Here you have to click on “Customize theme”

Step 2

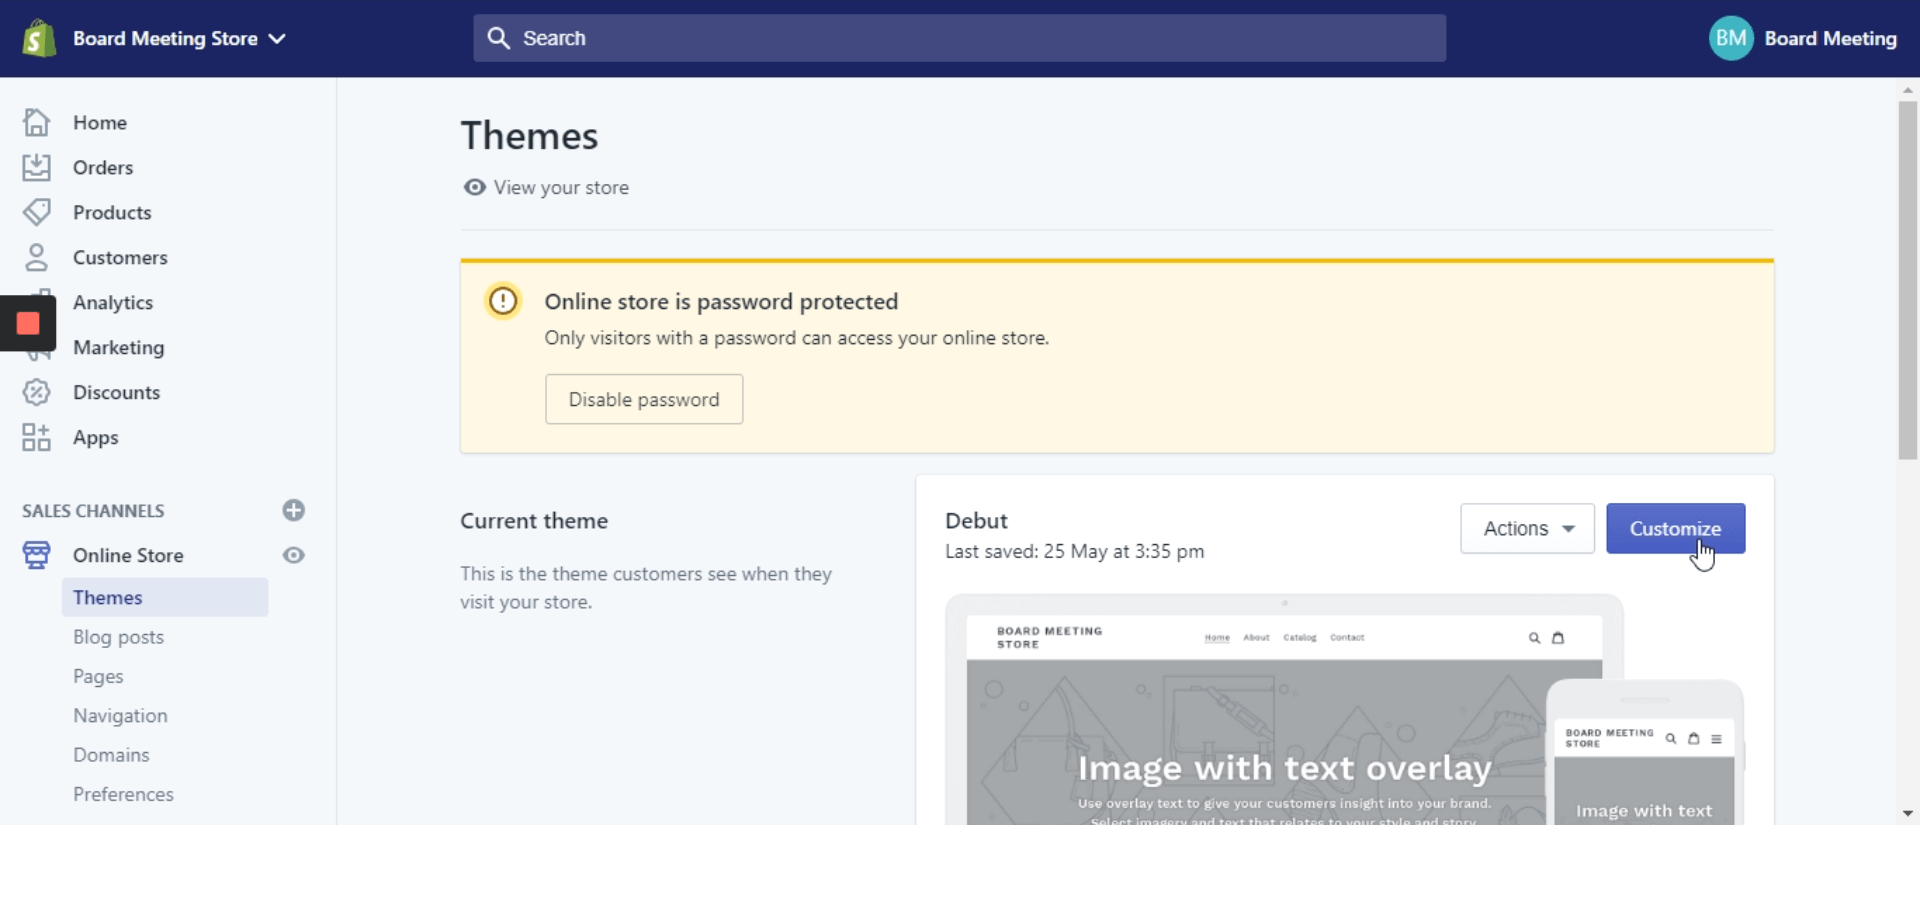
Click on “Customize”

server

Once you’ve open the “Themes” section, you will be able to see the “Customize” button in the right side of the screen, just click on it.

Step 3

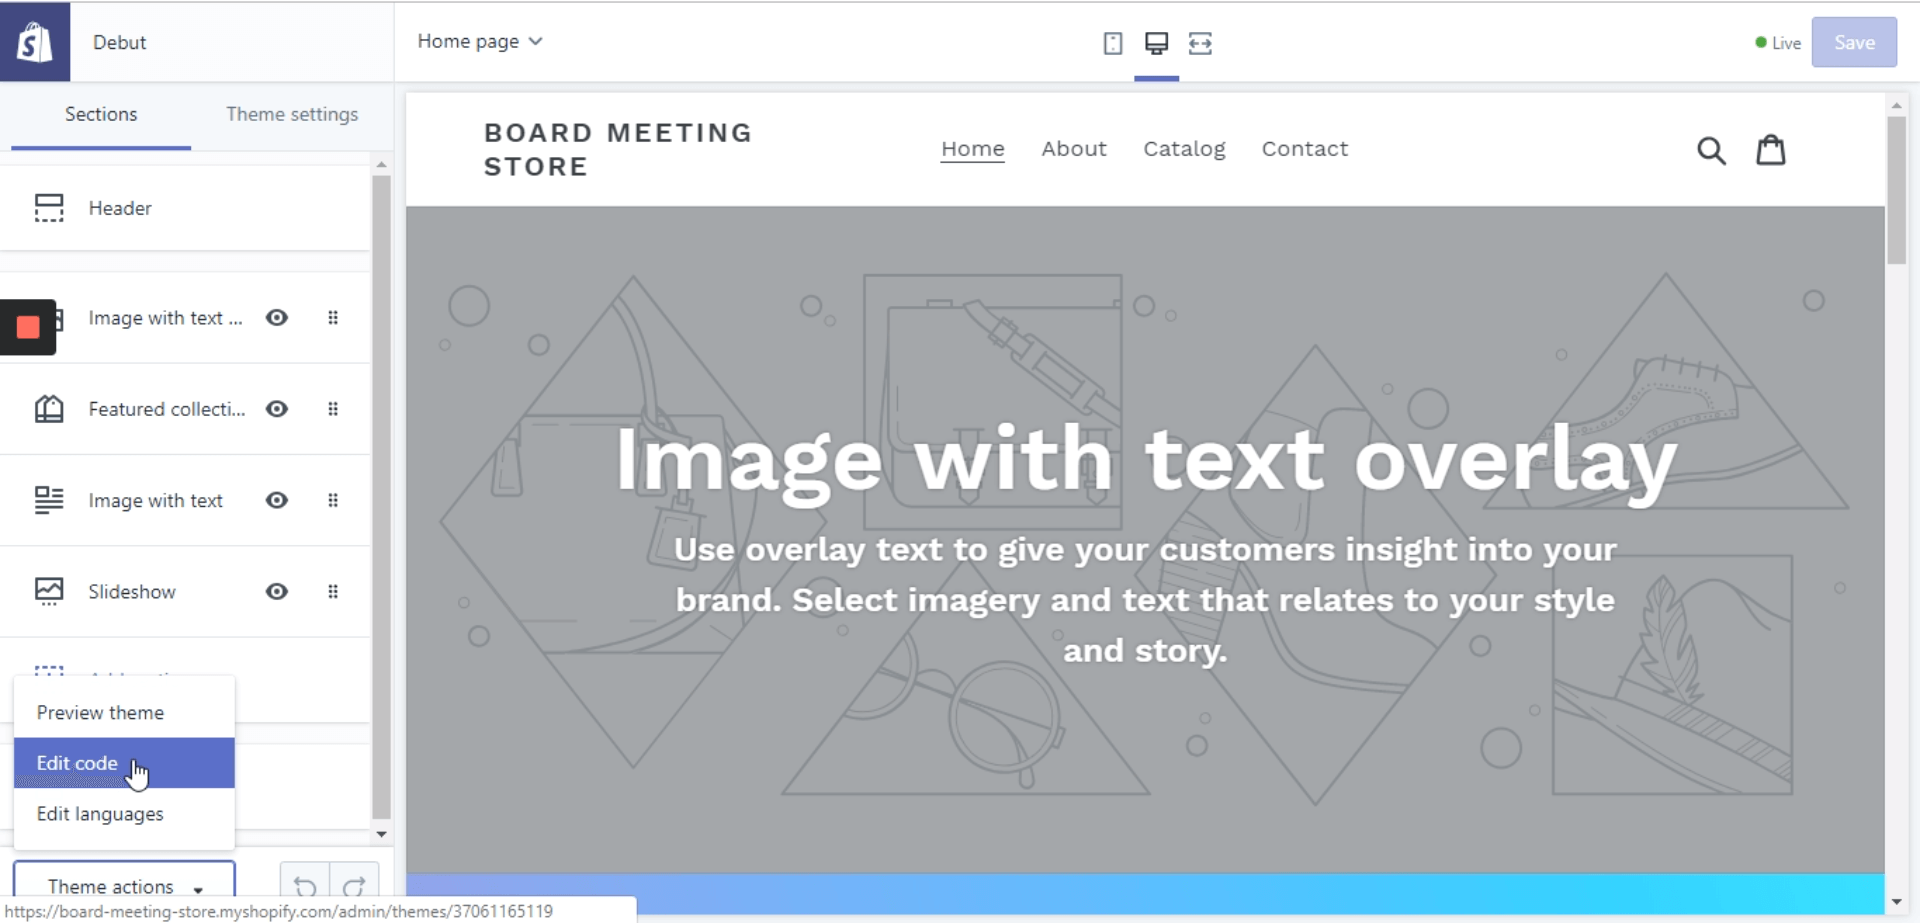
Click on “Edit code”

server

Here you have to go to the lower left side corner, there you will see an option that is named “Theme actions” you have to click on it, this will display a list of options where you’ll find “Edit code” option.

Step 4

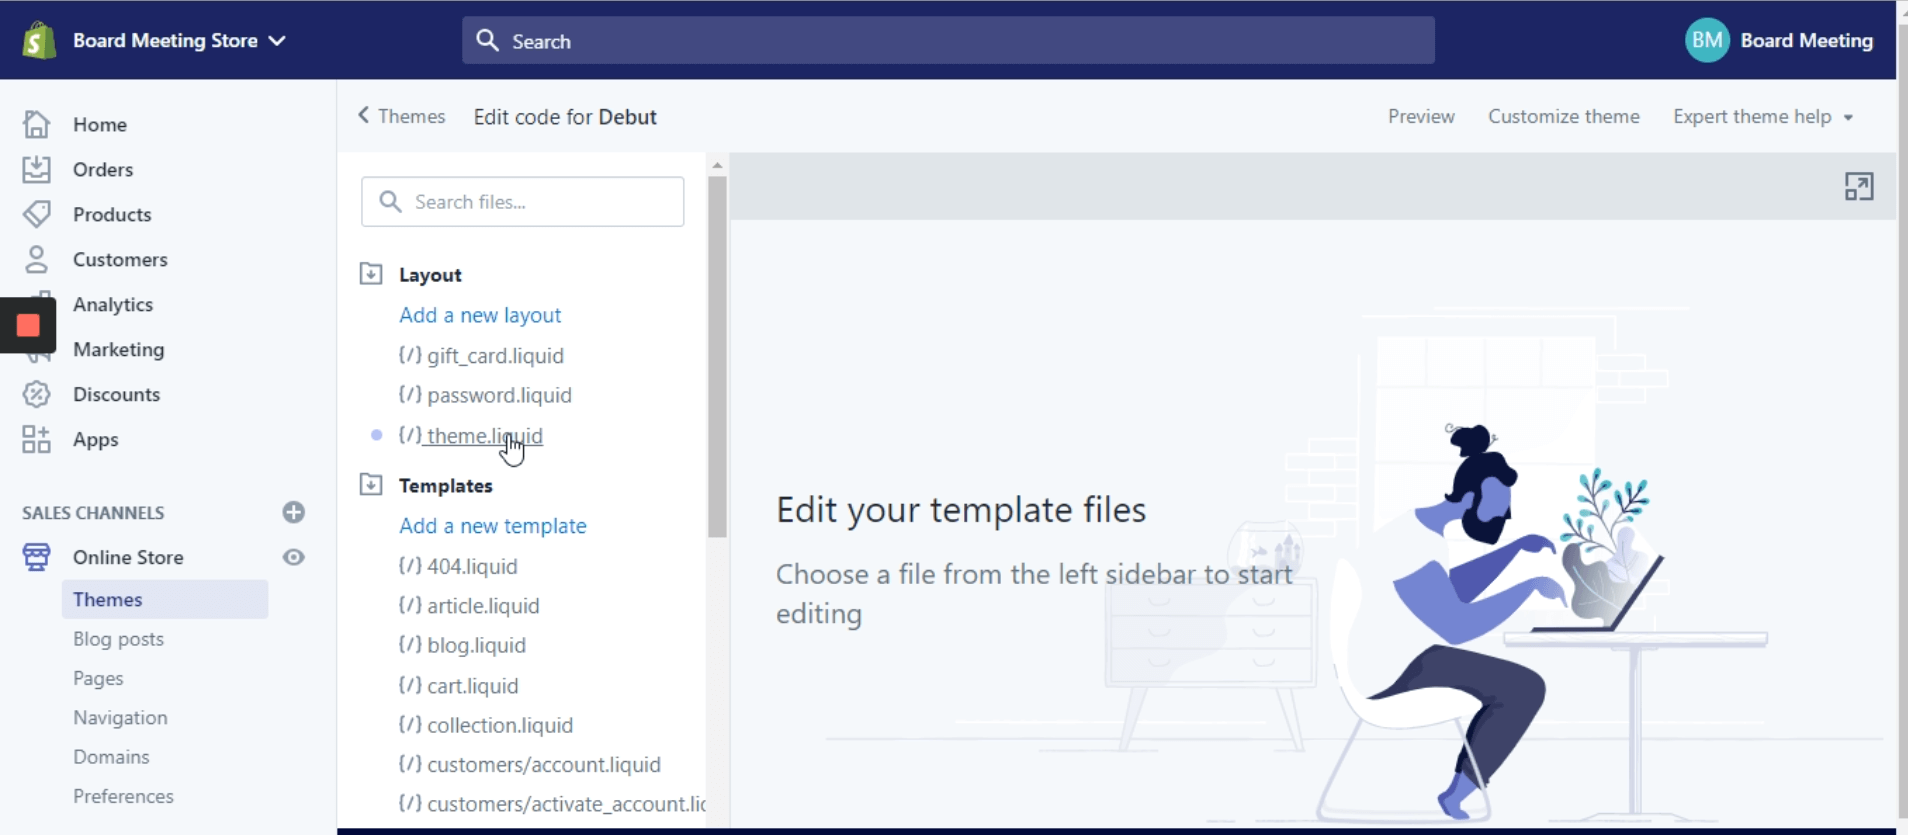
Click on “{/} theme.liquid”.

server

Here you have to go to the “Layout” folder and click on it to display a .liquid files list, now click on “{/} theme.liquid”, this will automatically generate a code file in the right side of the screen.

Step 5

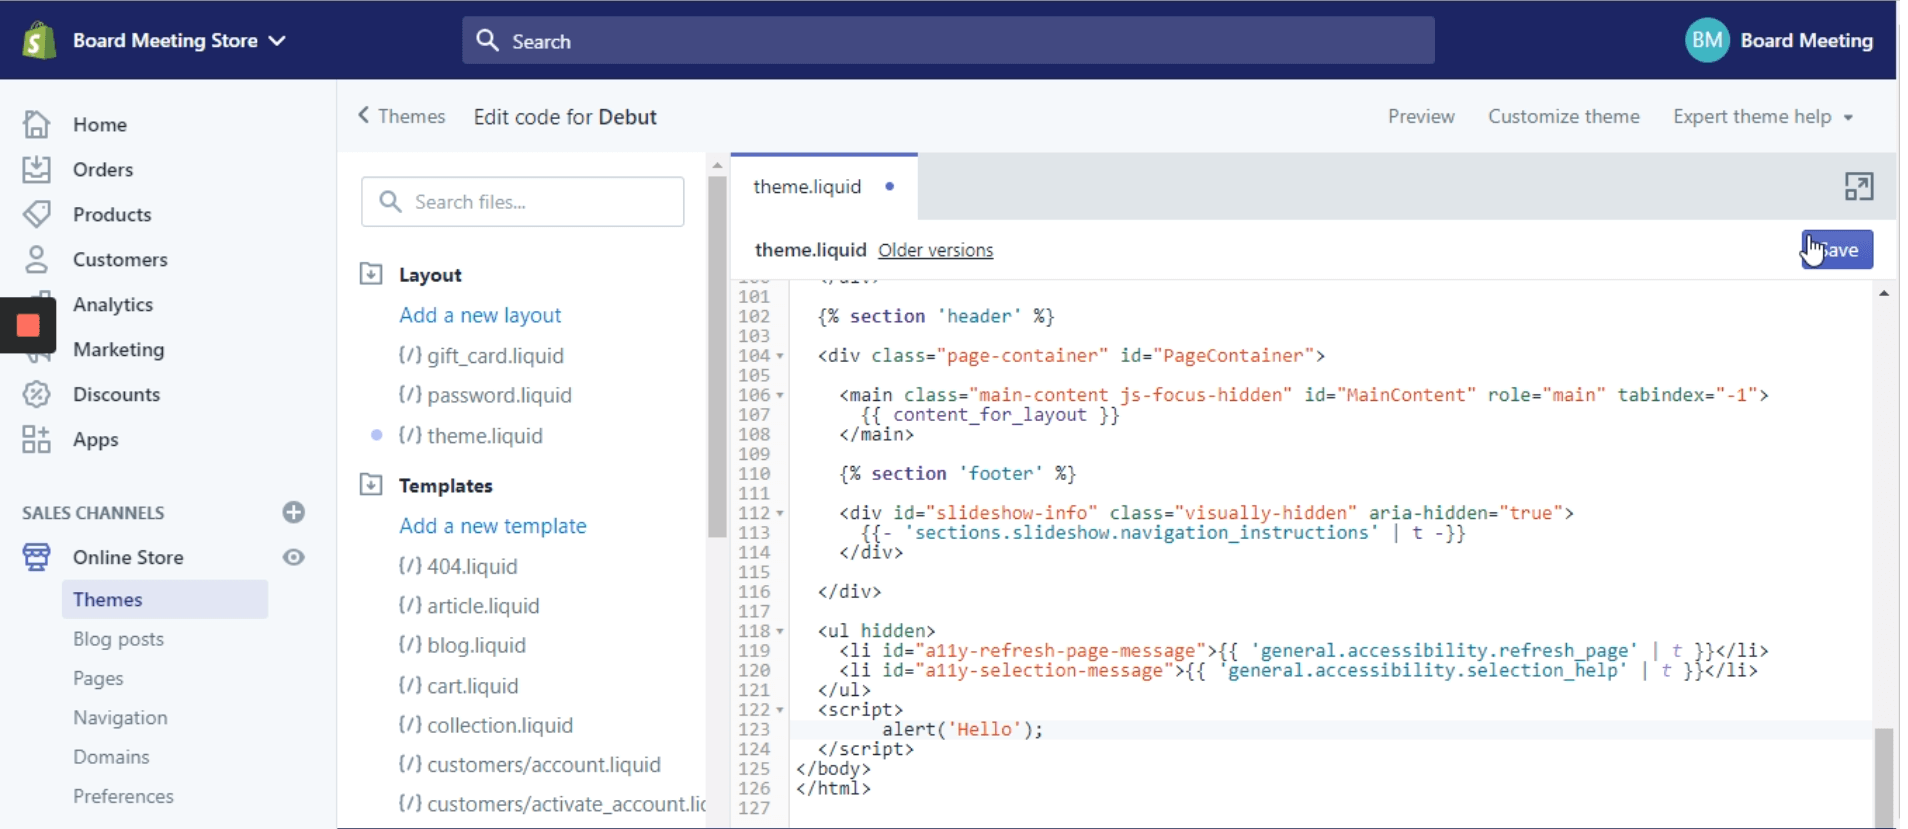
Find "</body>" section

server

Here you can add the below Javascript code, just above “</body>” section.

								
	<script src="https://letzchat.pro/firestoreconfig/plugin/letzchat.js"></script>
																																

Step 6

Save and refresh your site to see the results.

Test Translations

To test the translation on the page into a specific language, you can use the following code in the browser console:

	
    lzSwitchLanguage('fr');
			

Exclude Elements

If there are elements on your website that you do not want to be translated, such as certain text or code snippets, you can use the data-notranslate attribute. This attribute can be added to any HTML element to prevent it from being translated by the LetzChat Website Plugin. Here's how to use it:

																		
	<p data-notranslate><Your non-translatable content here.</p>
										

Validate Installation

Run this function in the browser console to validate proper installation of the LetzChat Script.

Upon initial install it will return 'stats'. This verifies installation. Once translations are enabled, it will return 'active'.

	
lzPlanStatus